
I bought Whispbar last year after doing some research vs Yakima and Thule solutions. These bars seemed to be the most silent, while being as low profile as possible. I bought the rack originally for my A3 which was going to be my new daily commuter car, but having this "low profile" meant it rendered the sun roof on the A3 completely useless because I could no longer fully open it. Also, my A3 didn't come with a roof rail, which meant I had to mount the roof rack by having pads sit on the roof, and brackets go under the window rubber molding. I didn't like this way of mounting, so I decided to move the rack to my STI by using the rain gutter method.
I used the following
![Image]()
Some during-install and after-install pictures
![Image]()
![Image]()
![Image]()
![Image]()
![Image]()
![Image]()
How many wings do I have? Well...how about FOUR???
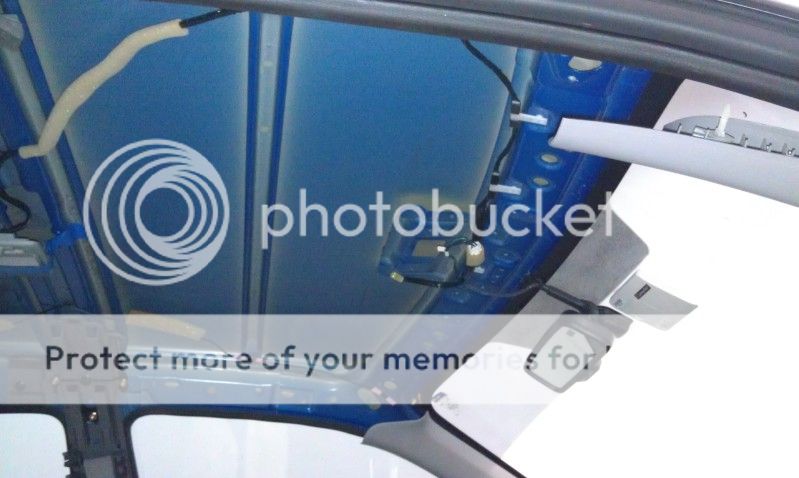
Rain gutter had to come out for the install. I also had to drop the headliner (which meant taking out most of the interior from chest-up) so I could replace the brackets. I put the new one in with liberal dose of silicone for weather proofing. The most trouble I had was actually drilling the rain gutters for the screw holes for the roof rack. I measured many times then drilled it but the curvature of the rain gutter meant I couldn't measure it straight up using a tape measure. Even though I now have oval-looking holes instead of circular hole in the rain gutter, you can't see it because the roof rack pads are hiding the whole thing.
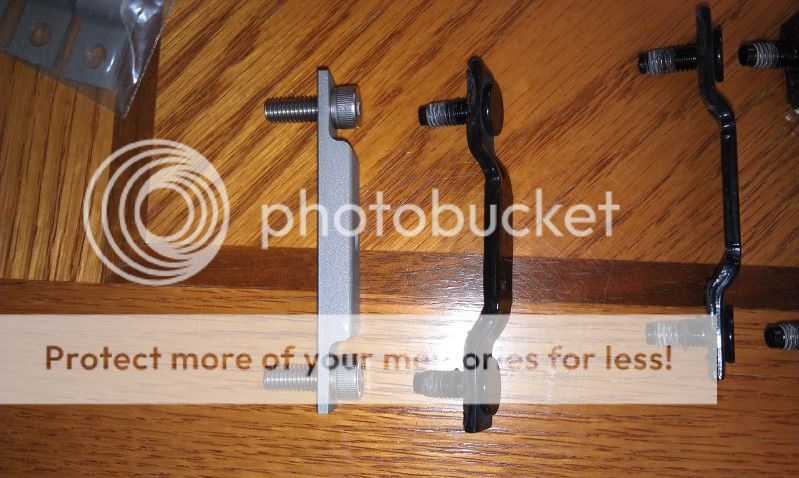
Below is the comparison of stock rain gutter brackets vs krazy's version
![Image]()
I used the following
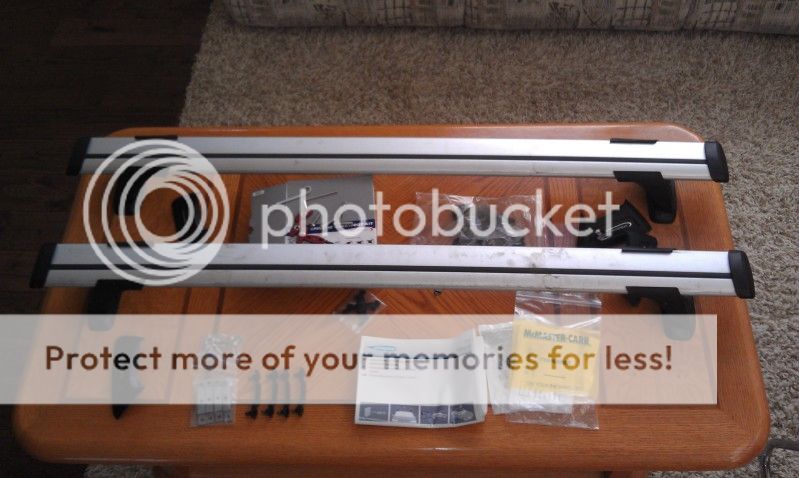
- Prorack Whispbar S16 (through-bar)
- Fit Kit 323 (permanent)
- Beefed-up roof rack brackets for GD Impreza Sedan by krazy
- M6x1.0x50mm set screws and low profile nuts
Some during-install and after-install pictures


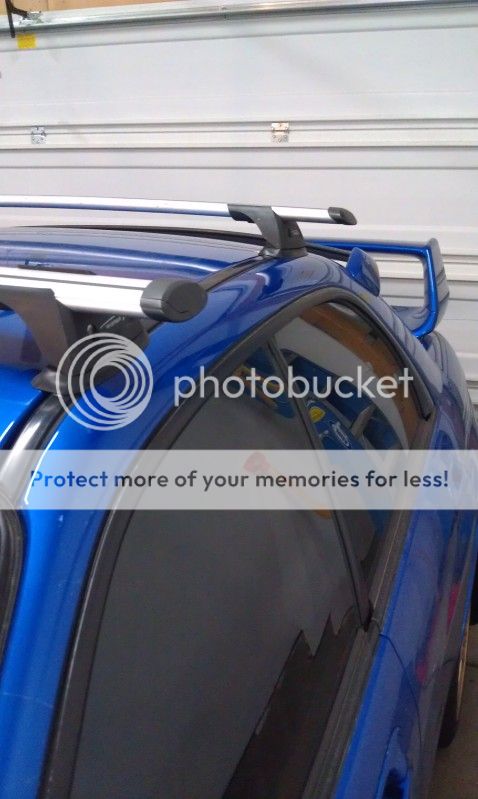
How many wings do I have? Well...how about FOUR???
Rain gutter had to come out for the install. I also had to drop the headliner (which meant taking out most of the interior from chest-up) so I could replace the brackets. I put the new one in with liberal dose of silicone for weather proofing. The most trouble I had was actually drilling the rain gutters for the screw holes for the roof rack. I measured many times then drilled it but the curvature of the rain gutter meant I couldn't measure it straight up using a tape measure. Even though I now have oval-looking holes instead of circular hole in the rain gutter, you can't see it because the roof rack pads are hiding the whole thing.
Below is the comparison of stock rain gutter brackets vs krazy's version