

***This will take a while so don't attempt anything listed below. It is subject to a lot of change.***
Scope:
The following process is based on the 07 WRX / STI Service Manual and is intended to help you disassemble your OEM shortblock.
Service Manual Reference:
2007 > Impreza (WRX & STI) > Service Manual > Engine Section (H4DOTC) (Part1) > Mechanical (H4DOTC) > Cylinder Block
http://techinfo.subaru.com/html/ixSearchNkSm.jsp?level=3&model_year=2007&vehicle_line=Impreza+%28WRX+%26+STi%29&pid=267755
Disclaimer:
When in doubt, have a qualified technician or shop repair your engine for you. The following procedure contains guidelines for disassembling the 2007 STI OEM shortblock and may not accurately reflect your particular car's engine. Read your Service Manual first when disassembling the OEM shortblock.
Safety:
Wear mechanics gloves, longsleeves, and safety glasses when disassembling the OEM shortblock. Gloves and longsleeves protect against abrasions and cuts from sharp metal. The shortblock has several razor sharp edges where the aluminum has been machined. The shortblock may contain coolant, oil, and liquid gasket. The shortblock weighs ~135 lbs when packaged for shipping. Make sure it sits on a workbench that can support this weight in addition to any forces you place on it.
Tools:
3/8" Drive Ratchet
1/2" Drive Breaker Bar
1/2" to 3/8" Drive Adapater
3/8" Drive Swivel Adapter
Socket Extension
10mm 6 Point Socket (short)
12mm 6 Point Socket (short)
12mm 12 Point Socket
22mm or 7/8" Socket
#3 Phillips Head Socket
4mm Hex Bit Socket - http://www.harborfreight.com/cpi/ctaf/displayitem.taf?Itemnumber=98229
14mm Hex Bit Socket - http://www.harborfreight.com/cpi/ctaf/displayitem.taf?Itemnumber=98229
Nylon Pry Bars - http://www.harborfreight.com/cpi/ctaf/displayitem.taf?Itemnumber=67021
Telescoping Magnet
Utility Knife
Needle Nose Pliers
OEM Jack
Flashlight
Hammer
Adjustable Wrench
Shop Rags
Long & Thin Flat Head Screw Driver (at least 8" long)
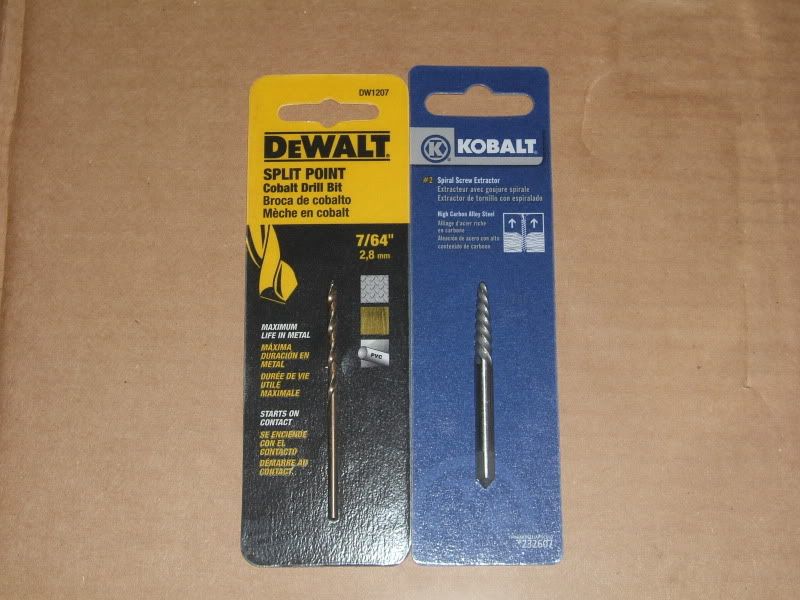
Power Drill
7/64" Drill Bit
#2 Easy Out
![Image]()
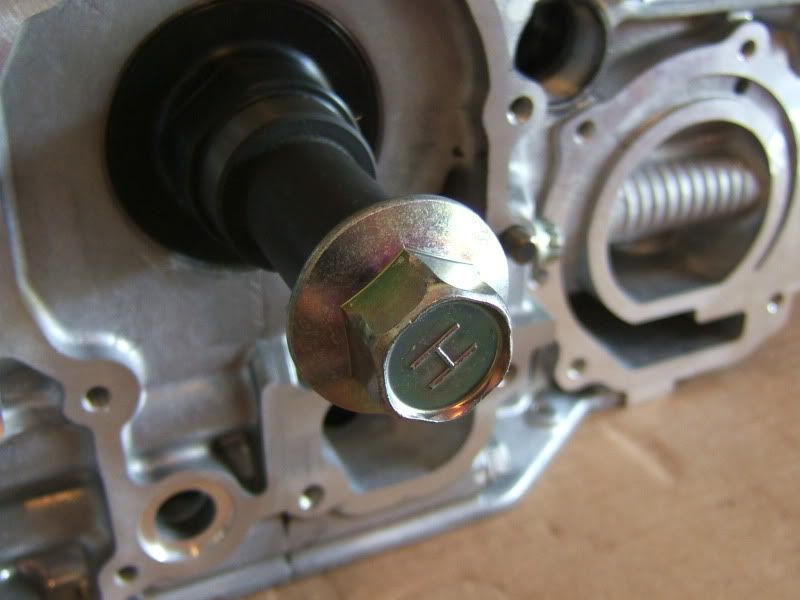
Crank Pulley Bolt - Subaru Part #12369AA011
![Image]()
Special Tools:
The following tools can be purchased from Subaru to ease the process of disassembly. These tools can not be purchased directly from the dealership, but several aftermarket parts companies are willing to supply them. They are expensive. As such, I have not used any of these in this DIY. Some of the helpful links at the bottom of this post demonstrate fabricated tools.
499097700 - Piston Pin Remover
Materials:
Electrical Tape
Packing Wrap
Cardboard
Ziploc Bags
Sharpie Pen
Overview:
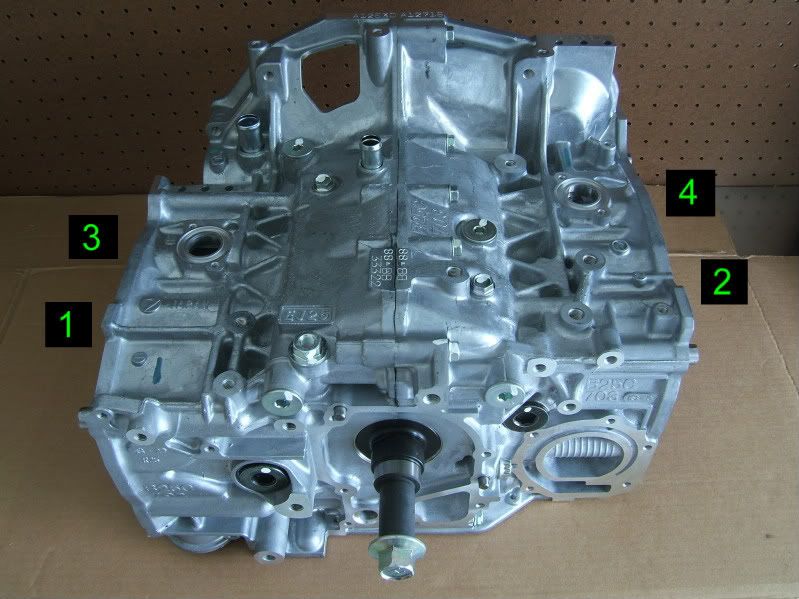
The OEM shortblock is composed of two aluminum cast sections that are held together with bolts and liquid gasket. A forged crankshaft is sandwiched between bearings in the center and is connected to the rods, piston pins, and pistons. The OEM shortblock comes with cast pistons and rods. There are passages built into the block for the movement of oil and coolant. Gaskets, O-rings, and liquid gasket are used to keep theses fluids inside the motor during operation. The 4 cylinder positions are shown in the photo below. Refer to these positions for all instructions.
![Image]()
Procurement:
It is not necessary to buy a new OEM or built shortblock depending on the condition of the one you take out of the vehicle. Many times the block can be reworked by an engine builder and sized for new pistons and bearings. If the block is in bad condition, an OEM or built shortblock can be purchased from several vendors listed on IWSTI. It's important to search for a block based on the price, reviews, and vendor reputation. An OEM shortblock will cost at least $2,000 from most vendors. Aftermarket vendors will typically beat the price of any dealerships. If you browse through the aftermarket websites, they can give you an idea of the products they offer, but it is better to call them to find out exactly what they have. The vendor should ask for identification of the vehicle which may include the year, make, model, VIN, and Engine Code. These items can be found on a nameplate under the hood. Keep in mind that replacing a shortblock may involve work to the heads such as resurfacing. It will involve replacing the head gaskets and possibly other seals. It may also involve replacement of the water pump, oil pump, oil cooler, pulleys, and timing belt. The cost of replacing the shortblock can go up quickly so be prepared prior to starting. I'd like to give a quick thanks to P&L Motorsports for processing my shortblock order.
Preparation:
Read the Service Manual instructions for disassembling the OEM shortblock. Read or watch DIY's to help fill in the gaps or find alternate means to accomplish the same task. Prior to starting, acquire a sturdy workbench and some shelving to store parts. Prior to working on the shortblock, put down 2 or 3 large pieces of cardboard on the workbench top to help protect the machined surfaces from damage. Damaged surfaces do not seal well and may require repair.
Helpful Links:
Some of these are directly related while others deal with STI engines in general.
Nasioc - STI Engine Compendium - http://forums.nasioc.com/forums/showthread.php?t=1431376
Nasioc - STI Shortblock Disassembly - http://forums.nasioc.com/forums/showthread.php?t=1435733
Youtube - STI Shortblock Piston Removal - http://www.youtube.com/watch?v=xmlNIaapInk&feature=related
Youtube - STI Shortblock Rebuild - http://www.youtube.com/watch?v=byfNt-0iP6U
Youtube - STI Shortblock Honing - http://www.youtube.com/watch?v=f6CEkkG-j8s&feature=fvw
Youtube - STI Shortblock Sleeving - http://www.youtube.com/watch?v=SIgq2R_D5wU&feature=channel
Scope:
The following process is based on the 07 WRX / STI Service Manual and is intended to help you disassemble your OEM shortblock.
Service Manual Reference:
2007 > Impreza (WRX & STI) > Service Manual > Engine Section (H4DOTC) (Part1) > Mechanical (H4DOTC) > Cylinder Block
http://techinfo.subaru.com/html/ixSearchNkSm.jsp?level=3&model_year=2007&vehicle_line=Impreza+%28WRX+%26+STi%29&pid=267755
Disclaimer:
When in doubt, have a qualified technician or shop repair your engine for you. The following procedure contains guidelines for disassembling the 2007 STI OEM shortblock and may not accurately reflect your particular car's engine. Read your Service Manual first when disassembling the OEM shortblock.
Safety:
Wear mechanics gloves, longsleeves, and safety glasses when disassembling the OEM shortblock. Gloves and longsleeves protect against abrasions and cuts from sharp metal. The shortblock has several razor sharp edges where the aluminum has been machined. The shortblock may contain coolant, oil, and liquid gasket. The shortblock weighs ~135 lbs when packaged for shipping. Make sure it sits on a workbench that can support this weight in addition to any forces you place on it.
Tools:
3/8" Drive Ratchet
1/2" Drive Breaker Bar
1/2" to 3/8" Drive Adapater
3/8" Drive Swivel Adapter
Socket Extension
10mm 6 Point Socket (short)
12mm 6 Point Socket (short)
12mm 12 Point Socket
22mm or 7/8" Socket
#3 Phillips Head Socket
4mm Hex Bit Socket - http://www.harborfreight.com/cpi/ctaf/displayitem.taf?Itemnumber=98229
14mm Hex Bit Socket - http://www.harborfreight.com/cpi/ctaf/displayitem.taf?Itemnumber=98229
Nylon Pry Bars - http://www.harborfreight.com/cpi/ctaf/displayitem.taf?Itemnumber=67021
Telescoping Magnet
Utility Knife
Needle Nose Pliers
OEM Jack
Flashlight
Hammer
Adjustable Wrench
Shop Rags
Long & Thin Flat Head Screw Driver (at least 8" long)
Power Drill
7/64" Drill Bit
#2 Easy Out
Crank Pulley Bolt - Subaru Part #12369AA011
Special Tools:
The following tools can be purchased from Subaru to ease the process of disassembly. These tools can not be purchased directly from the dealership, but several aftermarket parts companies are willing to supply them. They are expensive. As such, I have not used any of these in this DIY. Some of the helpful links at the bottom of this post demonstrate fabricated tools.
499097700 - Piston Pin Remover
Materials:
Electrical Tape
Packing Wrap
Cardboard
Ziploc Bags
Sharpie Pen
Overview:
The OEM shortblock is composed of two aluminum cast sections that are held together with bolts and liquid gasket. A forged crankshaft is sandwiched between bearings in the center and is connected to the rods, piston pins, and pistons. The OEM shortblock comes with cast pistons and rods. There are passages built into the block for the movement of oil and coolant. Gaskets, O-rings, and liquid gasket are used to keep theses fluids inside the motor during operation. The 4 cylinder positions are shown in the photo below. Refer to these positions for all instructions.
Procurement:
It is not necessary to buy a new OEM or built shortblock depending on the condition of the one you take out of the vehicle. Many times the block can be reworked by an engine builder and sized for new pistons and bearings. If the block is in bad condition, an OEM or built shortblock can be purchased from several vendors listed on IWSTI. It's important to search for a block based on the price, reviews, and vendor reputation. An OEM shortblock will cost at least $2,000 from most vendors. Aftermarket vendors will typically beat the price of any dealerships. If you browse through the aftermarket websites, they can give you an idea of the products they offer, but it is better to call them to find out exactly what they have. The vendor should ask for identification of the vehicle which may include the year, make, model, VIN, and Engine Code. These items can be found on a nameplate under the hood. Keep in mind that replacing a shortblock may involve work to the heads such as resurfacing. It will involve replacing the head gaskets and possibly other seals. It may also involve replacement of the water pump, oil pump, oil cooler, pulleys, and timing belt. The cost of replacing the shortblock can go up quickly so be prepared prior to starting. I'd like to give a quick thanks to P&L Motorsports for processing my shortblock order.
Preparation:
Read the Service Manual instructions for disassembling the OEM shortblock. Read or watch DIY's to help fill in the gaps or find alternate means to accomplish the same task. Prior to starting, acquire a sturdy workbench and some shelving to store parts. Prior to working on the shortblock, put down 2 or 3 large pieces of cardboard on the workbench top to help protect the machined surfaces from damage. Damaged surfaces do not seal well and may require repair.
Helpful Links:
Some of these are directly related while others deal with STI engines in general.
Nasioc - STI Engine Compendium - http://forums.nasioc.com/forums/showthread.php?t=1431376
Nasioc - STI Shortblock Disassembly - http://forums.nasioc.com/forums/showthread.php?t=1435733
Youtube - STI Shortblock Piston Removal - http://www.youtube.com/watch?v=xmlNIaapInk&feature=related
Youtube - STI Shortblock Rebuild - http://www.youtube.com/watch?v=byfNt-0iP6U
Youtube - STI Shortblock Honing - http://www.youtube.com/watch?v=f6CEkkG-j8s&feature=fvw
Youtube - STI Shortblock Sleeving - http://www.youtube.com/watch?v=SIgq2R_D5wU&feature=channel


")


