

Heres a quick "cheater" way to change your rear axle.
Heres the tools you'll need to do the job
1/2 torgue wrench (good for 145lbs)
32mm socket
1/2 drive ratchet
19mm socket
19mm wrench
not shown:
and a plastic hammer
jack and safety stands
wheel wrench
![Image]()
1.Jack the car up from the rear diff, place your safety stands under the cross frame on each side of the car.
2. Put you emergency brake on.
3. remove rear wheels
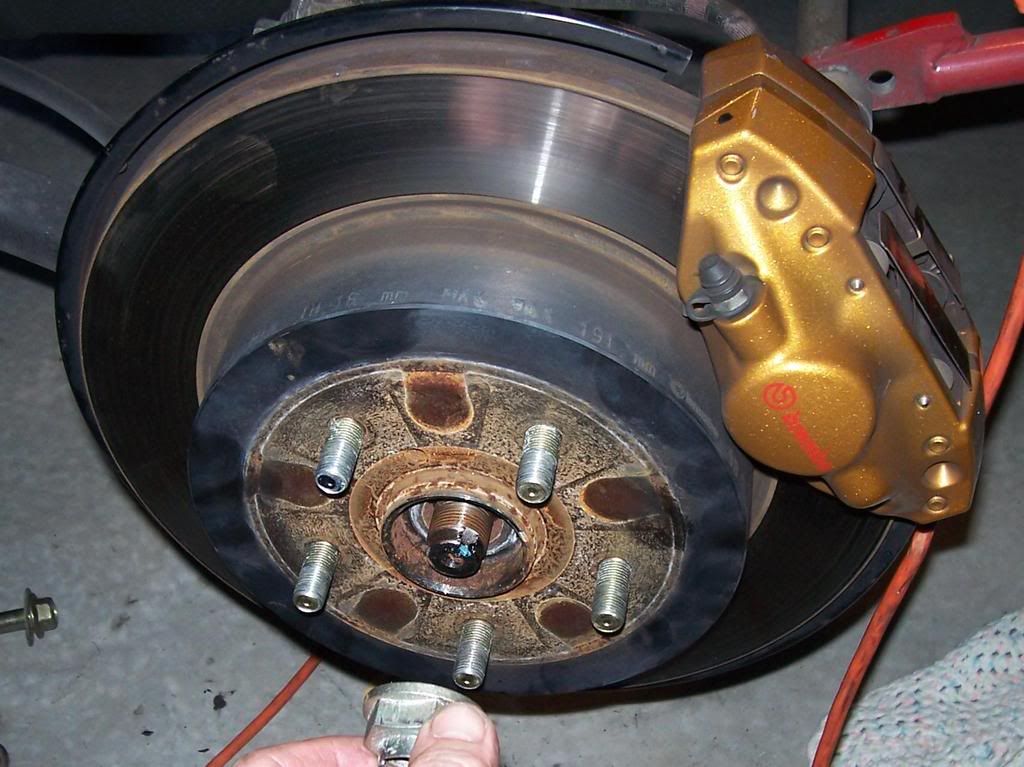
4. uncrimp the axle bolt, I just spun it off with my 32mm socket and impact gun.
![Image]()
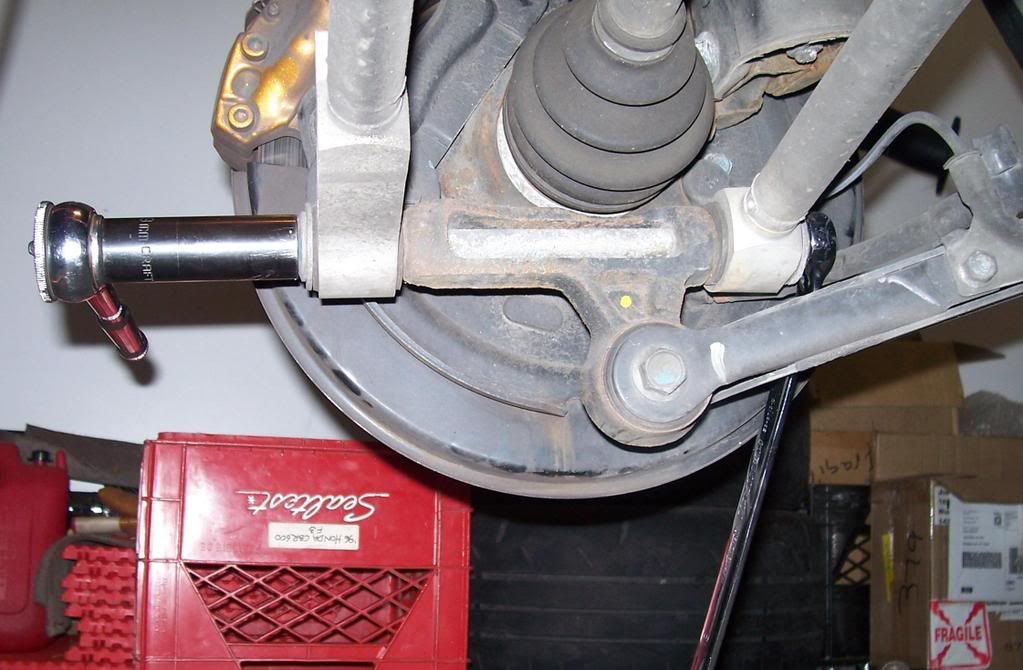
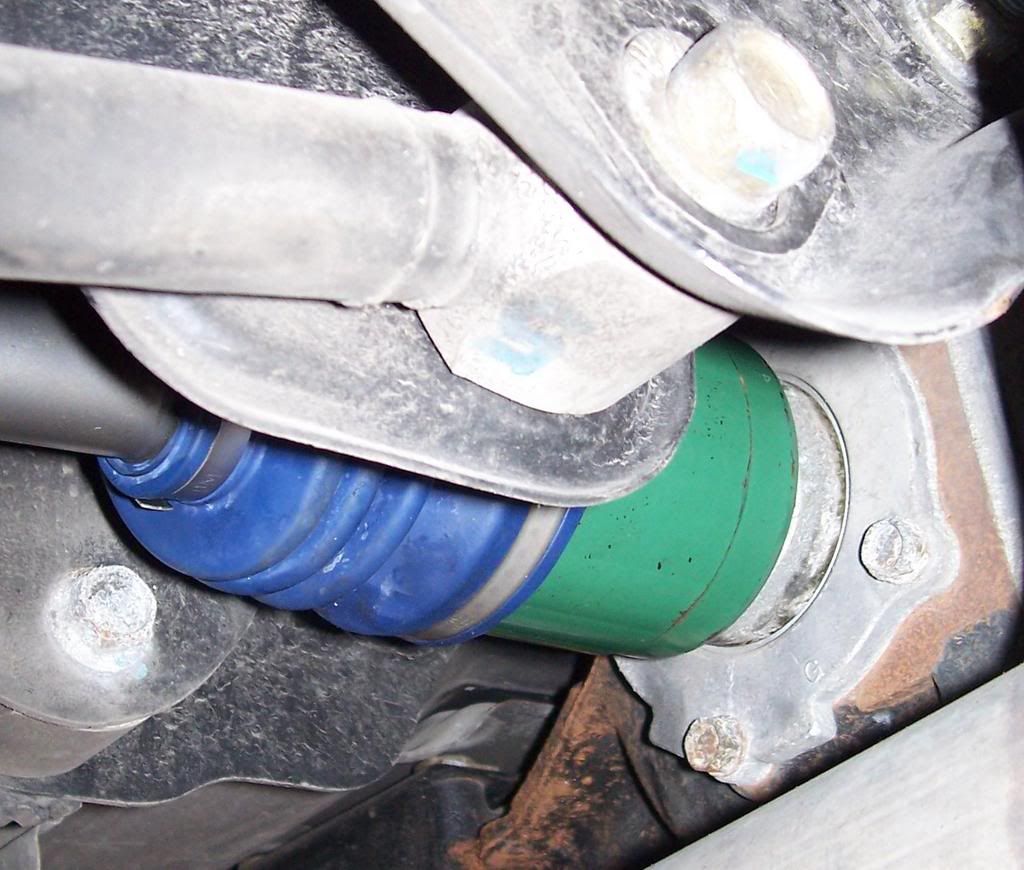
5. Take your 19mm socket and 1/2 drive ratchet and with your 19mm wrench remove the bolt and nut holding the two lower control arms in place. Note: you may need a breaker bar for this and spraying some wd40 on the nut might help also.
![Image]()
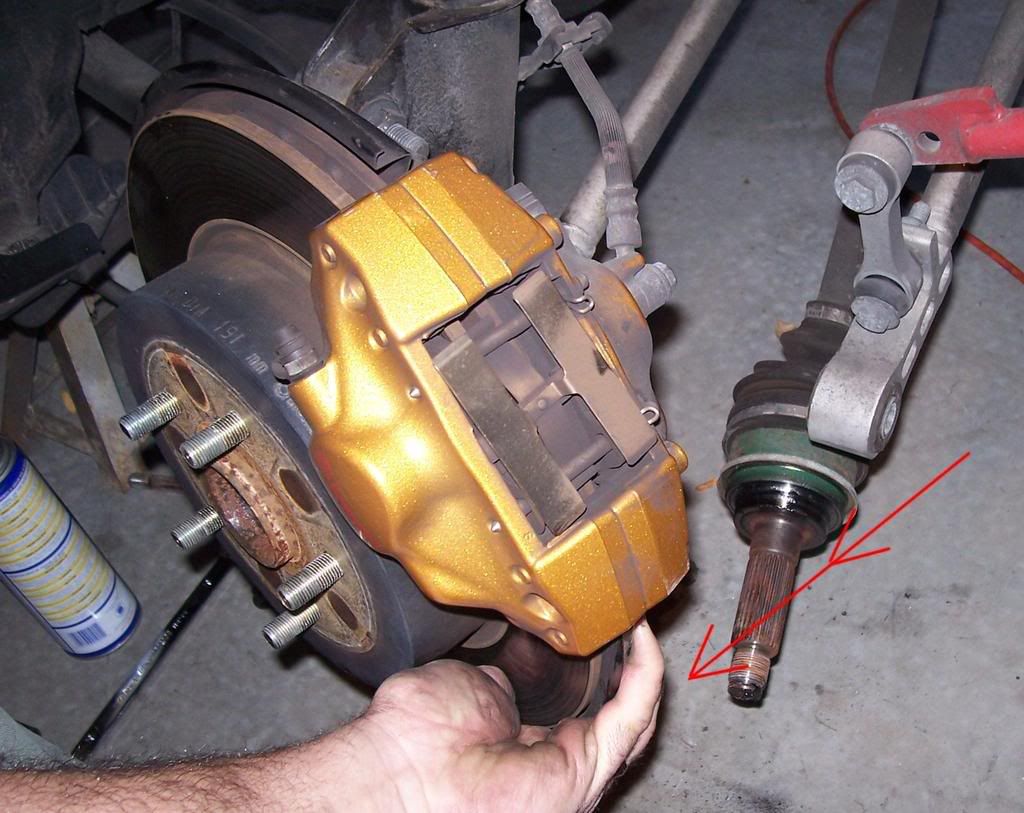
6.Now pull the rotor/brake/hub assembly toward you at the rear untill you can wiggle the axle out from it.
![Image]()
7. An extra set of hands would be good at this point but I managed to do this next part myself, take the axle a firmly and sharply pull it out of the rear diff casing. There is a clip in the rear diff housing that holds onto the axle while being carefull of the diff axle seal when you pull the axle out not to damage it.
here is the end of the axle from inside the diff.
![Image]()
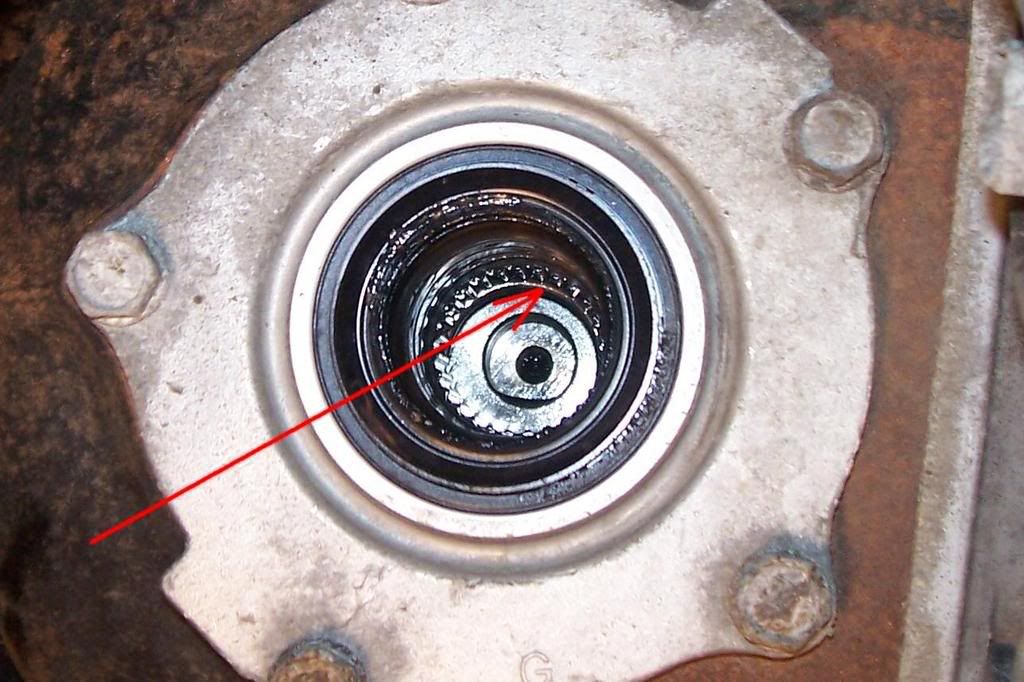
and inside the diff you can see the clip still in place.
![Image]()
8. Now take your new axle or rebuilt axle and install it in reverse being carefull not to damage the seals in the rear diff. I layed underneath the car while sliding the axle into the diff then sharply firmly jamming the axle back into the clip inside the diff. Give it a tug out just to make sure your in the clip properly.
![Image]()
9. Take the outer end of the axle and put it back into the hub assembly by pulling the assembly out of the way and lift the axle in place then place the hub back over the axle.
![Image]()
10. now take your control arm bolt and nut and slide it back together, it will take some wiggling to get it through. This is where you may need a plastic hammer. torquing it to 145 lbs
![Image]()
11. Place the axle nut back on the end of the axle and tighten to 140lbs torque and then recrimp the nut like it was. A new axle nut should be used for proper torque value.
12. Replace your wheel and lower your car:tup: and your ready to hit the strip once again.:lol:
Heres the tools you'll need to do the job
1/2 torgue wrench (good for 145lbs)
32mm socket
1/2 drive ratchet
19mm socket
19mm wrench
not shown:
and a plastic hammer
jack and safety stands
wheel wrench

1.Jack the car up from the rear diff, place your safety stands under the cross frame on each side of the car.
2. Put you emergency brake on.
3. remove rear wheels
4. uncrimp the axle bolt, I just spun it off with my 32mm socket and impact gun.
5. Take your 19mm socket and 1/2 drive ratchet and with your 19mm wrench remove the bolt and nut holding the two lower control arms in place. Note: you may need a breaker bar for this and spraying some wd40 on the nut might help also.
6.Now pull the rotor/brake/hub assembly toward you at the rear untill you can wiggle the axle out from it.
7. An extra set of hands would be good at this point but I managed to do this next part myself, take the axle a firmly and sharply pull it out of the rear diff casing. There is a clip in the rear diff housing that holds onto the axle while being carefull of the diff axle seal when you pull the axle out not to damage it.
here is the end of the axle from inside the diff.

and inside the diff you can see the clip still in place.
8. Now take your new axle or rebuilt axle and install it in reverse being carefull not to damage the seals in the rear diff. I layed underneath the car while sliding the axle into the diff then sharply firmly jamming the axle back into the clip inside the diff. Give it a tug out just to make sure your in the clip properly.
9. Take the outer end of the axle and put it back into the hub assembly by pulling the assembly out of the way and lift the axle in place then place the hub back over the axle.
10. now take your control arm bolt and nut and slide it back together, it will take some wiggling to get it through. This is where you may need a plastic hammer. torquing it to 145 lbs

11. Place the axle nut back on the end of the axle and tighten to 140lbs torque and then recrimp the nut like it was. A new axle nut should be used for proper torque value.
12. Replace your wheel and lower your car:tup: and your ready to hit the strip once again.:lol:


